

5 Fringe-Cutting Tips: Blunt, Straight, Micro, Blunt & Retro

Whether blunt, soft, or retro-inspired—fringe is having a major moment. With clients craving statement shapes (and less fear of commitment), now’s the time to refine your bang-cutting techniques and master precision across every texture.
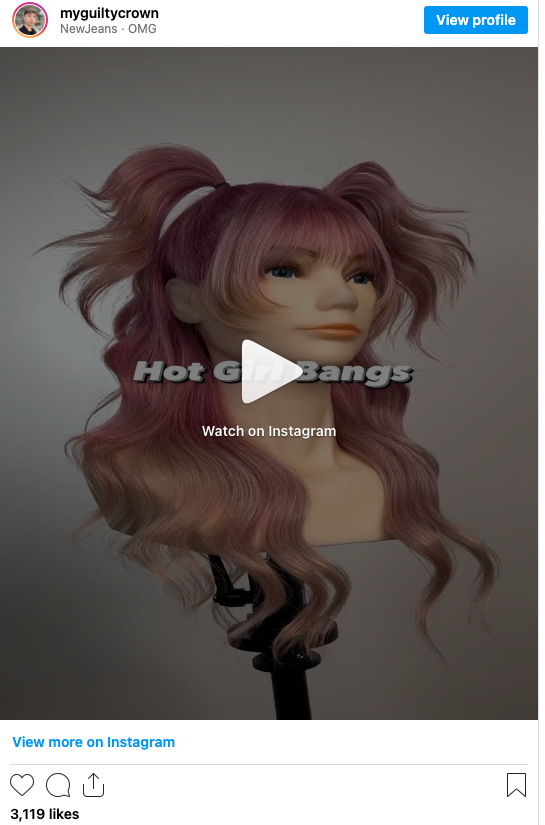
1. Blunt Bangs That Contour Without Excess Weight
When cutting straight-across bangs, take a modern approach. The historically heavy look has transformed into the Instagram-viral “Hot Girl Bangs” according to ARC™ Scissors Ambassador and BTC Team Member Gilad Goldstein (@myguiltycrown).

Refine your technique, utilize small sections: “Limit the bang section to the middle of the pupil,” Gilad explains. “A narrower bang section means less hair and a softer framing of the eye area. This also leaves more hair around the cheeks to add soft framing layers to contour the face,” he adds. Gilad cuts dry for precision, using the PARAGON II from ARC™ Scissors. to create soft, clean lines around the eye area.

Press play to watch the full tutorial below:
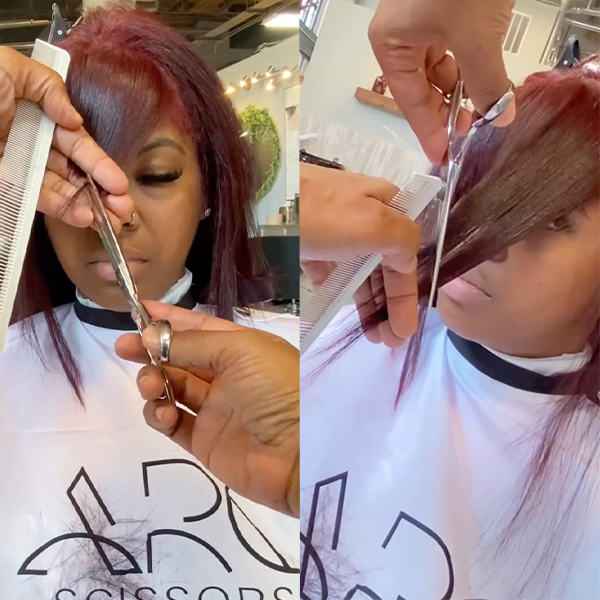
2. How to Cut Blunt Bangs Without Bulk
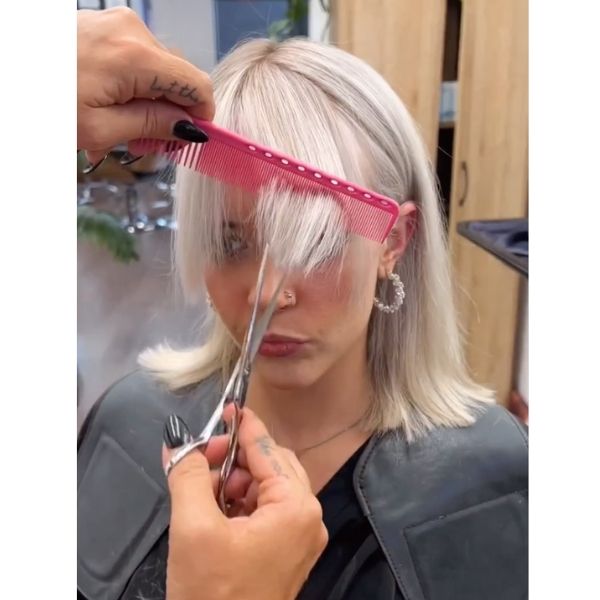 ARC Scissors Ambassador Rachel Williams (@rachelwstylist) prefers to cut curtain bangs dry.
-
You can accurately see the length you’re removing, helping avoid cutting too short or uneven.
-
Dry cutting reveals natural hairlines and cowlicks, especially important for curtain bangs that need balance on both sides.
-
Her go-to technique: Elevate the bang section to 45 degrees to create layers with texture, then point cut the outline. Use deeper point cutting to soften the perimeter, and elevate 1-inch sections to 90 degrees to remove weight as needed

Click here to watch Rachel’s dry-cutting technique in action:
Photo Credit: Instagram via @rachelwstylist
See the finished result below:
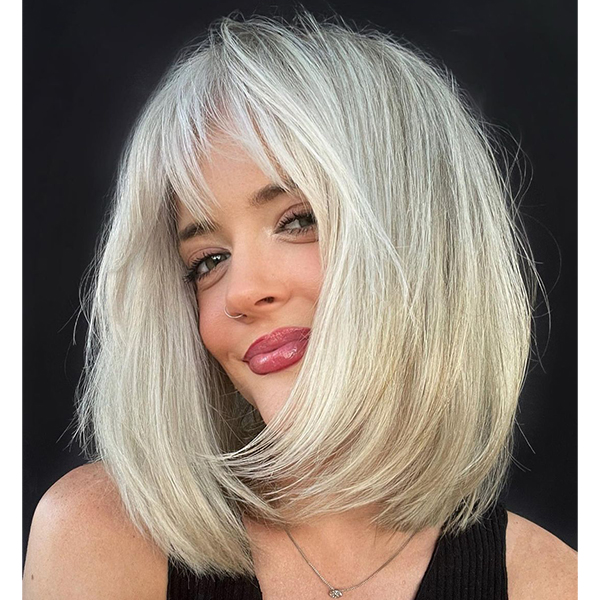
Photo Credit: Instagram via @rachelwstylist
3. How To Simplify Cutting Micro Fringe


Photo Credit: Instagram via @matt.swinney
Learn why this texturizing tool works for soft, short fringe
4. Texturizing Heavy Ends: Try This
For high-density clients who want a classic ’80s-style bang, Colorado-based ARC™ Scissors Ambassador Ray Hornback (@rayvoltagebeauty) will use a comb to elevate the bang section to 45-degrees and point cut into the hair. “This creates a short to long hair in the direction we want [the bangs] to push,” Ray explains. Finish texturizing by using your fingers to flip the bang to 90-degrees and point cut, closing your shears as your hands move upward.
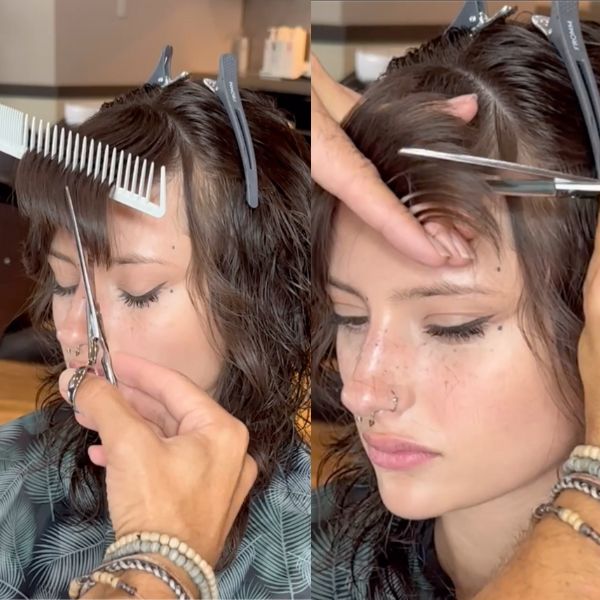
Photo Credit: Instagram via @rayvoltagebeauty
5. Blending Shaggy Bangs—Here’s How
ARC™ Scissors Ambassador John George (@johnwgeorge) is typically known for his sleek and precise haircuts—but, when his client requested a shaggier style, he knew exactly how to change up her look without the process of a full haircut.
John’s Quick Cut Process: “I didn’t shag the back as much,” John explains. “I opted for some inverted layering in the back to maintain length and density. And [I] blended the front and back with some point cutting. The finished look is about high texture, not sleek and smooth,” John adds. John's scissor of choice: The Paragon ll
Click here to see his technique in action:
Shaggy Bangs: Check out the effortless finished result.
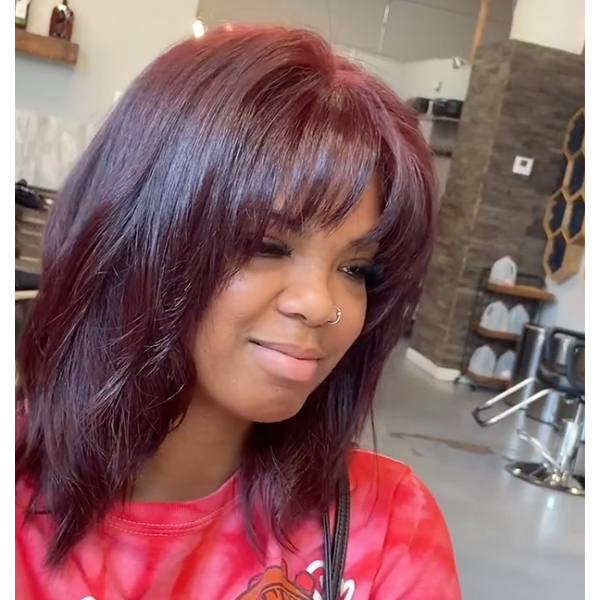
Photo Credit: Instagram via @johnwgeorge
Ease Your Fringe-Cutting Fear With John’s Words Of Encouragement:
“In the past, I would never cut bangs because I wasn’t good at it. They would always look crooked and too short from over-cutting to try and straighten them. Fear propelled me to avoid bangs and to suggest other options when a client would ask about getting bangs,” John shares. “Cut confidence is one thing to have. But confidence in general is necessary to conquer the fears we encounter as hairstylists. Set a fear goal. Don’t tell anyone about it. Execute quietly,” he advises.

Comments on this post (0)