

4 CUTTING TECHNIQUES FOR AVOIDING A FLAT SILHOUETTE
Use These Cutting Techniques To Create Volume & Texture
For clients looking for a fresh chop, the disconnected pixie is this season’s go-to cropped cut. The piece-y, voluminous texture gives the style movement and an edge, but sometimes styles can fall flat. To help give this cut the volume it deserves, ARC™ Scissors Architect Gilad Goldstein (@myguiltycrown) went live on BTC’s Facebook to teach his cutting techniques for creating a full shape. Scroll down to learn it all!
Strategic Sectioning:
With shorter appointment times, Gilad uses a condensed sectioning technique to preserve hair where he needs it and streamline his cutting time. Check out his sectioning:
- Start with a horizontal parting from the top of the head to the top of each ear.
- Comb the hair in front of each ear forward and clip away.
- Then, create a horizontal parting from temple to temple to create two large sections on the top of the head.
- For the back, create a vertical center parting starting at the second back parting to create two more sections in the back. Leave the nape section out and comb smooth.

Pro Tip: If clients have thinner or finer hair, preserve hair at the crown with a diagonal back parting from temple to temple.
Technique #1: Build The Shape From The Back:
By starting the pixie at the nape, Gilad builds the shape from the bottom up, allowing him to control where the weight will live while avoiding any flat holes or spots. Here’s how:

- Create a center vertical parting and use your fingers or a comb to elevate the hair straight out from the head.
- Then, angle the section so it is long to short (the top of the comb/your fingers should be closer to you).
- Following the angle, cut a blunt line, keeping the hair long at the top of the section and hugging the hairline at the bottom.
Gilad likes to cut hair wet, so he uses the HARMONY II scissor by ARC™ Scissors because the blade is sharp from pivot to tip, so the scissors don’t bend or push the hair. “They’re also really comfortable in my hand. I don’t have to hold my hands in a strange position all day and they are super comfortable,” Gilad explains.
Pro Tip: Keep your body position directly behind each section to avoid any additional overdirection.
Scissors Used:
 ARC™ HARMONY II
Technique #2: Create A Visible Weight Line:
Continuing up the back of the head, Gilad switches to horizontal partings in the center back sections. This creates a visible weight line, building fullness to the shape he established in the previous section. Here’s how it’s done:

- Working one section at a time, find the round of the head and split each section into two.
- Take the section closest to the center of the head, hold the hair horizontally and elevate it up so it meets the horizontal parting that runs from temple to temple.
- Extend the tension so the section is about three fingers in length and cut a blunt line.
- Use a small section as a working guide and continue cutting around the head, creating a weight line that sits right behind the ear.
Pro Tip: For less volume, shorten the tension to two fingers.
Gilad shows his visible weight line below!

Technique #3: Connecting The Sides:
For the sections in front of the ears, the goal is to connect them to the established weight line while keeping the hairline textured. What’s Gilad’s secret? Angles. Check out how Gilad connects his side sections here:

- Use hair from the previous section as a guide for the side.
- Take a horizontal section and overdirect it toward the client’s face. This will maintain the length in the back while keeping the hairline short.
- Cut a blunt line to connect the established weight line to each side. (This technique also helps the hair begin to flow back naturally).
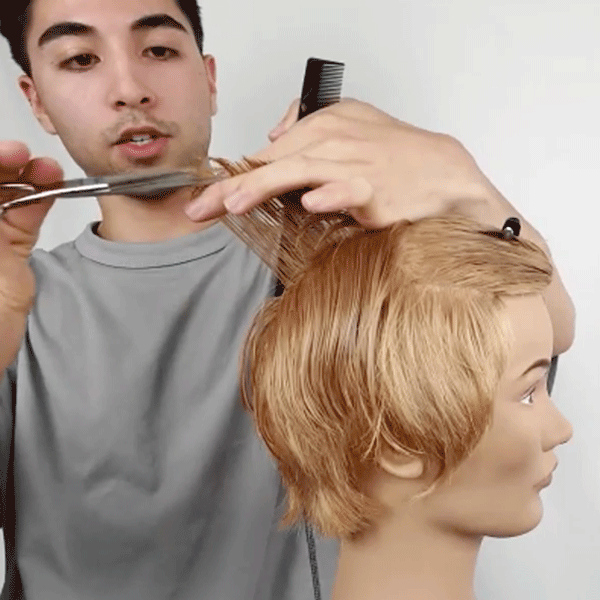
Technique #4: Create Disconnected Texture With Vertical Sections:
For the back top section, Gilad doesn’t take the traditional route. Instead of using horizontal sections that follow the natural shape of the head, he takes vertical sections to really emphasize the texture in this area.
First, take a vertical center parting and create an angle that maintains length in the back. Check it out below:

Then, use a shallow point cut and cut the hair from short to long. Use this section as a traveling guide paying close attention that the angles are consistent. Gilad shows off this technique below:

Check out that natural volume!

Finish With A Customized Fringe:
Is your client up for a fresh fringe? The front top section is reserved just for that! But before connecting the back section to the fringe, Gilad prefers to comb the entire cut down to really get a good look at his established lines.
“Fluffing the hair is great to see the movement and texture that was created, but combing the hair flat really lets you see the shape and weight line before you disrupt it,” Gilad explains.
Note: For this cut, Gilad chose an on-trend curtain bang.
Check out the finished look!

Want a pair of HARMONY II scissors from ARC™ Scissors? Click here to purchase!
Comments on this post (0)