
4 Dry Cutting Techniques For Every Client
Cutting Education: Four Dry Cutting Techniques To Start Using ASAP!
Do you dry-cut your clients’ hair? Dry cutting reveals a client’s natural texture and allows for ultimate customization—that’s why we loved this Cutting Co-Lab at The BTC Show Online, where four expert cutters came together onscreen to teach their signature cuts using dry cutting techniques. From soft shaggy fringe to airy curly cuts to textured bobs, we have the tips below.
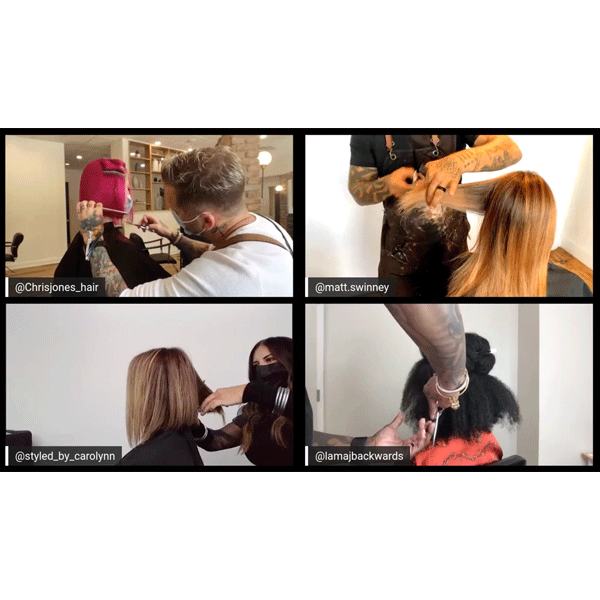
Check out ARC™ Scissors Team Members Matt Swinney (@matt.swinney), Chris Jones (@chrisjones_hair_), Jamal Edmonds (@lamajbackwards) and Carolynn Judd (@styled_by_carolynn) below and check out their go-to dry cutting techniques!
Technique #1: Creating A Soft Fringe
There is no doubt that shags are THE cut of 2020, and a soft, curtain fringe is the most important part. So what’s the secret to this trendy face frame? Matt gives a hint: It’s all in the elevation.
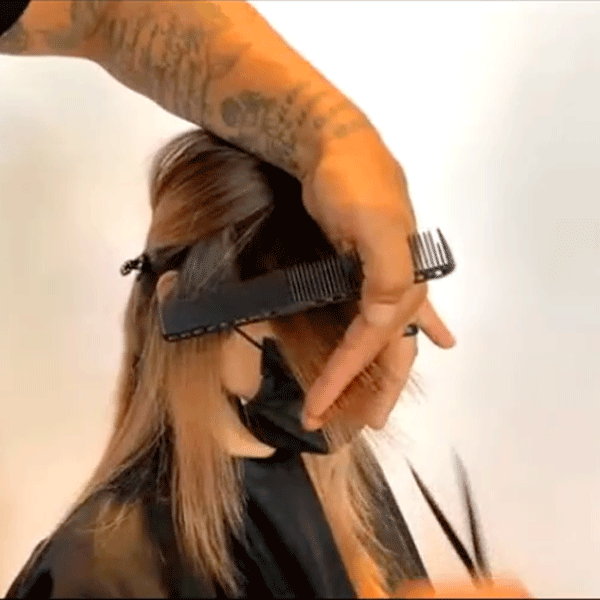
Check out Matt’s technique below for more:
- Take a horizontal parting in the center of the forehead at the hairline.
- Elevate the section straight out from the head. “The further out the section is, the softer the fringe. If the section is kept at zero elevation, the fringe will be heavier. A shag is all about softness, so elevation is important," Matt explains
- Use a soft point cut to create a horizontal line in the center of the section. Focus on keeping the center of the section a straight line. Them, angle the corners down slightly to create a U-shape.
- To connect the fringe to the face frame, Matt creates a diagonal back parting starting at the highest point of the fringe. Bringing the section forward, he uses his fingers to mimic the subsection and point cuts from short to long, using the corner of the fringe as the shortest guide.
Pro Tip: For this cut, Matt uses his PHANTOM II from ARC Scissors™ because the scissors feature a thinner blade. "When dry cutting it's important to that your scissors don't push or pull the hair," Matt explains. "So having a thinner blade allows me to cut through the hair easier without disruption," he adds.
Click Here To Purchase A Pair Of PHANTOM II From ARC™

Technique #2: Diffuse Curls While Maintaining A Strong Shape
For curly clients, a diffusion cutting technique will create space and highlight their natural curl pattern. But the wrong technique can disrupt the cut’s shape and leave holes within the interior. Below, Jamal shares his technique for creating diffusion while avoiding disruption.
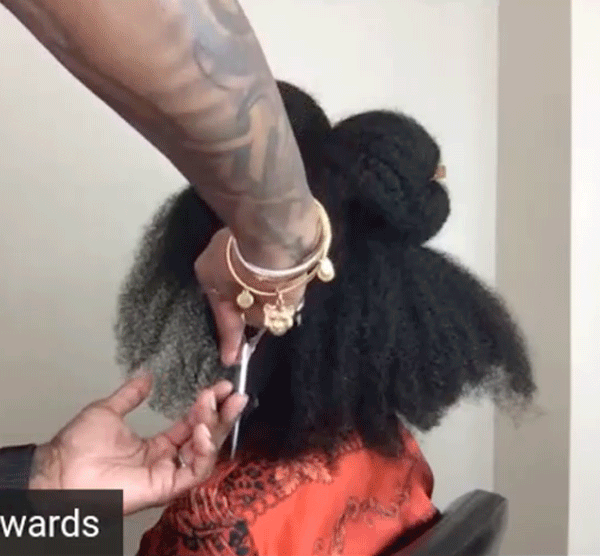
- After establishing the perimeter, Jamal creates two zones below the occipital.
- Using the previously cut perimeter as a guide, Jamal grabs a small vertical section with his knuckle and elevates the hair out to a 45 degree angle.
- With the scissors pointing down, Jamal uses a scooping motion to diffuse the client’s ends. Moving the scissors towards him and closing them as he exits the section.
Pro Tip: A dull shear can create frizz and damage the client’s ends. So for this haircut, Jamal uses his PARAGON II from ARC Scissors™ because they are made specifically for dry cutting, which means they stay sharper longer and won’t damage the hair.

Technique #3: Build Weight With Shear-Shattering
What's Carolynn's secret to her stacked bobs? Using her signature shear-shattering technique to build interior weight and movement. “It’s all about supporting the exterior of the haircut with internal texture,” she explains.
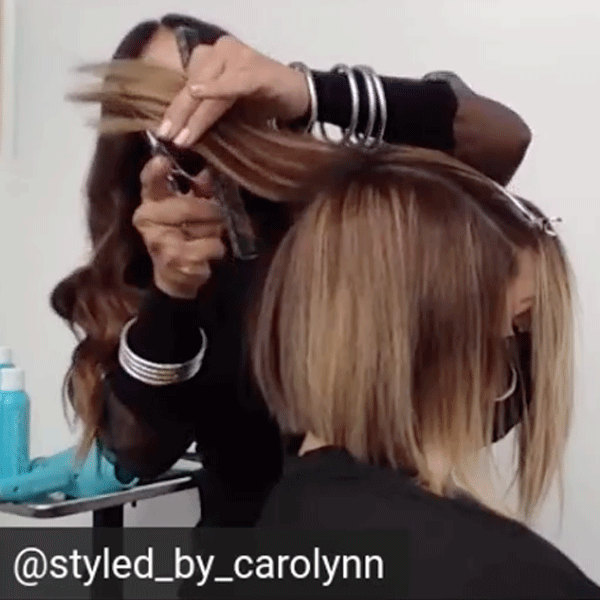
Check out a breakdown her technique below:
- Take a vertical section right above the occipital bone.
- Holding the section straight out, hold the scissors open just as you would for knotching, but use a sliding motion and closing the scissors when exiting the section. And THAT hair friends, is shear-shattering!
- Since the goal is to build weight in the back, Carolynn will shear shatter each section from short to long.
Pro Tip: For her shear-shattering technique, Carolynn explains that it is extremely important to use a sharp scissor. That’s why she uses her PHANTOM II from ARC Scissors™. Like Matt, Carolynn can use these scissors for her entire haircut and not worry about them becoming dull or damaging the cuticle of the hair.
Technique #4: Avoid A Bell-Shaped Bob With A Texturizer
If you’re one of Chris’s 276k Insta followers, you know that his bob haircuts are anything but bell-shaped. To create movement while maintaining a strong perimeter, Chris uses a slide cutting technique with his SYMMETRY 30/2 REVERSIBLE BLENDER from ARC™. You read that right—slide cutting with a texturizer! Why? “The SYMMETRY 30/2 only removes 15-20 percent of the hair, so it is very forgiving when removing weight,” Chris explains. “It also allows me to create texture without over-thinning,” he adds.
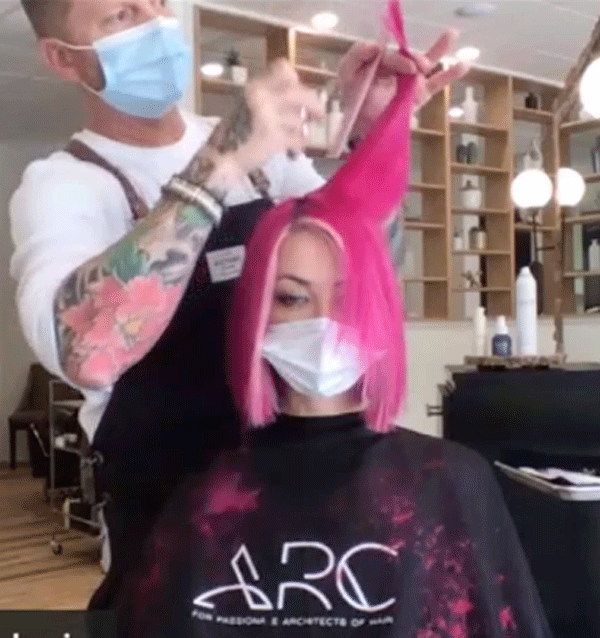
Check out his technique below:
- Taking pie sections starting at the crown, elevate the hair straight up from the head.
- Enter the hair with the straight blade of the texturizer, and use a scooping C-motion to slide cut, closing the shear when exiting. This will create space and movement without disrupting the blunt perimeter that was previously created.


Comments on this post (0)