

Stacked Angled Bob with Texture
A sexy stacked bob packed with texture is not only one of today’s most trending styles, but it is also uber-wearable and easy for clients to style! ARC™ Scissors Team member @styled_by_carolynn show’s us how to create this must-have style with genius tips and her signature shear shattering technique with her favorite ARC™ Designer Phantom 6”.

1. Before

2. Part the hair down the center. Create two sections in the front from the ear to the hairline, then two sections in the back from the apex to the nape. Always take the front sections from right behind the ear to make sure you have enough hair in front to create a dramatic angle. Split each of the back sections in half, creating quadrants.

3. Drop down the starting section at the nape. Starting in the middle, cut the hair in a U-shape with the shortest cut in the middle. "When creating shape and movement in a haircut," Carolynn explains, "the balance and weight of the shear is so important. That's why I love using the ARC™ Designer Phantom 6”. "
 ARC™ PHANTOM II
4. Beginning in the middle of the back and working outward, take 2-inch vertical sections, overdirect them at a 45-degree angle to the middle and point cut. Follow the original guide connecting the length. Continue this through the back sections.

5. After cutting the crown to match the guide length, remove excess bulk by elevating the hair up and out and point cutting. This will remove weight and begin to add texture.

6. Split the side section in half with an angled part from temple to top of head, leaving out a 1-inch piece in front.

7. Take 2-inch sections and overdirect them to the back section guide. This will connect the back to the front.
8. Point cut the front section to create the face frame angle of desired length.

9. To add graduated layers to the front, take 2-inch angled sections and overdirect towards the back, cutting to match the guide.

10. Create a Mohawk parting and divide into front and back sections. Take a small piece from the back to use as a guide and point cut to remove the corner.

11. Now that you have created the angled base of the cut, you can begin to texturize. Part the hair into four sections, the same way you started the cut. Use a shear shattering technique to texturize the hair from the inside-out, still using the ARC™ Phantom 6”. Follow the same elevation pattern and cut from the bottom to the top of each section. Want to learn more about shear shattering? Click here for Carolynn’s technique!

12. After the hair is round -brushed smooth and dry, take 2-inch sections and texturize with shear shattering, focusing on the heaviest parts of the hair to remove bulk and add texture. Shear shatter deeper into each section when working around the crown area to create more body and movement.

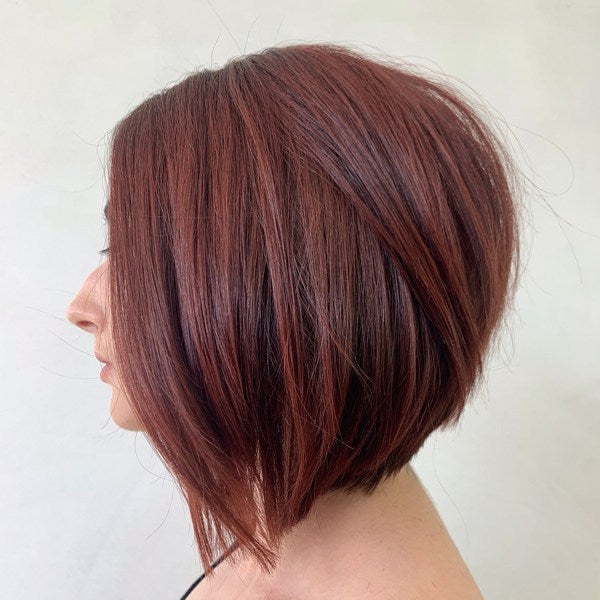
13. Finished look, straight.

14. Finished look, wavy.
Learn how to cut and finish a textured A-Line Bob from start to finish with @styled_by_carolynn. Click here.

Scissors Used
Comments on this post (0)