

Textured, Blunt Bob
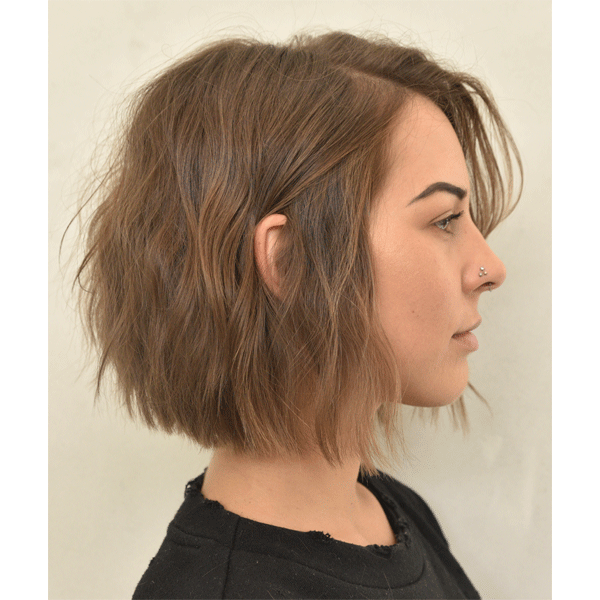
The cool-girl, textured bob has become a staple on Insta feeds, and since we know clients are BEGGING for this chop, we had cool-cutter and ARC™ Scissors Hair Architect Buddy Porter (@buddywporter) stop by The BTC House to drop all of the knowledge for creating this chic cut. We’re sharing the how-to steps below plus some genius tips you can take back to the salon, so keep scrolling to get all the deets!
Scissors Used: PARAGON II
1. What’s Buddy’s secret to a perfect blunt perimeter? Starting with clean, neat sections. Here’s how Buddy sections the hair:
- A middle parting from the front hairline to the top of the crown.
- A diagonal forward parting from the top of the crown to behind each ear.
- A center parting down the back of the head to the nape followed by two diagonal forward partings going from the top of the occipital bone to each ear.

Pro Tip: For a blunter line—or if your client has a lot of hair—use diagonal forward partings to create more sections in the back.
2. To keep the perimeter blunt, Buddy has the client look straight ahead and then he cuts the section using a natural fall with zero elevation. Once that is established, Buddy will have the client look down, he’ll comb through the section repeatedly to check for any unevenness and then he’ll clean it up with his scissors.

Pro Tip: For this cut, Buddy used the PARAGON II from ARC™ Scissors, which are specifically made for cutting dry hair. “Dry cutting scissors are made with a higher quality steel, which makes them sharper, and they cut through dry hair effortlessly, creating a seamless perimeter,” he says.
3. Once the baseline is created, Buddy likes to soften the line (just a little!) with a very shallow point cut. Why? “Since this is a blunt bob, we want the haircut to hold its shape as it grows out,” Buddy explains. Starting the haircut with point cutting would give the cut a very soft line. A shallow point cut after the perimeter is already established will just soften it up a bit.

4. Drop down the section that begins at the top of the occipital bone and again, use a natural fall with zero elevation to point cut the section using the established perimeter as a guide. When cutting, overdirect the sections toward you to preserve length in the front.

5. To create internal layering, Buddy uses a block graduation technique with a deep point cut. Here’s how it works:
- Take a 1- to 2-inch section and overdirect it 180 degrees straight up from the head. This will allow the baseline to fall out of the section and maintain a strong perimeter.
- Use a very deep point cut or knotching technique to create layers. These layers will be disconnected from the layers that will sit on top, giving the cut internal movement.

Pro Tip: When dry cutting, it’s important to not bend or pull on the hair when creating layers. That’s why Buddy always uses the PARAGON II from ARC™ Scissors. They stay sharper longer and hold their edge, meaning they cut through dry hair easily and won’t disrupt the cuticle or damage the ends.
6. Drop down the front sections and overdirect them back to the guide, then use a shallow point cut to connect to the baseline.

Pro Tip: Don’t freak out if the baseline isn’t perfect—it doesn’t have to be! “The point of a textured bob is to have a diffused baseline,” Buddy explains. If you want to remove more weight, use a deeper free-hand point cut.
7. For the top layers, take radial sections starting at the crown. Overdirect the section (about 1½ inches in size) toward the face and cut the corner within the section to create the layer. Be sure to not take the sections too deep or this will weaken the perimeter.

This haircut is very visual, Buddy explains, so if the top section still looks too heavy, bring the radial sections back up and slightly point cut to remove more weight.
8. If the client has existing fringe, use your scissors to blend them in with the rest of the hair. Pull the fringe straight forward and create the angle with your scissors instead of with your fingers.

When blending existing fringe, don’t start taking sections that are part of the bob, Buddy warns, or else you start to change the shape of the bob.
9. Curl with a 1¼-inch Marcel iron and finish with Virtue® Texturizing Spray.

Ready to try this cut behind the chair? Click here to purchase the PARAGON II from ARC™ Scissors and use all of Buddy’s tips!


Want to learn more from Buddy? Click here to purchase his class on BTC University and have lifetime access!
Comments on this post (0)